Table of Contents
ToggleMost homeowners treat their garage floor like an afterthought, until oil stains, concrete dust, and cracked surfaces make the space feel unfinished and uninviting. The good news? Upgrading a garage floor doesn’t require a contractor’s budget or specialized skills. From epoxy coatings to interlocking tiles, affordable flooring options can handle vehicle traffic, resist chemicals, and completely change how the space looks and functions. This guide walks through five proven budget-friendly garage flooring solutions, covering materials, installation realities, and which option works best for different use cases.
Key Takeaways
- Cheap garage flooring ideas like epoxy coatings, interlocking tiles, and concrete stain offer budget-friendly solutions ranging from $0.30 to $6 per square foot without requiring professional contractors.
- Proper surface preparation—including degreasing, etching, and crack repair—is critical for any garage flooring project, as skipping this step causes premature peeling or failure within months.
- Epoxy coatings deliver a high-gloss, professional finish with excellent chemical resistance for $1–$3 per square foot, but require 72 hours before vehicle use and perform poorly in temperatures below 50°F or above 90°F.
- Interlocking tiles offer the fastest DIY installation, finishing a two-car garage in a weekend with zero cure time, though durability depends on choosing tiles at least 1/2 inch thick to handle vehicle weight.
- Match your garage flooring choice to actual use: epoxy and thick tiles for heavy-duty workshops, mats and paint for light storage, and stain for a low-maintenance, natural aesthetic at minimal cost.
Why Garage Flooring Matters More Than You Think
A bare concrete slab might seem adequate, but unfinished garage floors come with real drawbacks. Concrete is porous, meaning it absorbs oil, antifreeze, and other automotive fluids that create permanent stains and unpleasant odors. Bare concrete also generates dust from surface degradation, a constant battle for anyone using the garage as a workshop or storage area.
Beyond aesthetics, proper flooring protects the concrete itself. Moisture infiltration through untreated slabs can lead to spalling (surface flaking) and cracks, especially in freeze-thaw climates. A sealed or coated floor prevents water penetration and extends the lifespan of the underlying slab.
Finally, finished flooring makes the space more versatile. Whether someone’s converting part of the garage into a home gym, workshop, or hobby area, a clean, durable surface makes the space feel intentional rather than leftover. Upgraded flooring also increases resale appeal, buyers notice when a garage looks maintained versus neglected.
Epoxy Coatings: Professional Look Without the Price Tag
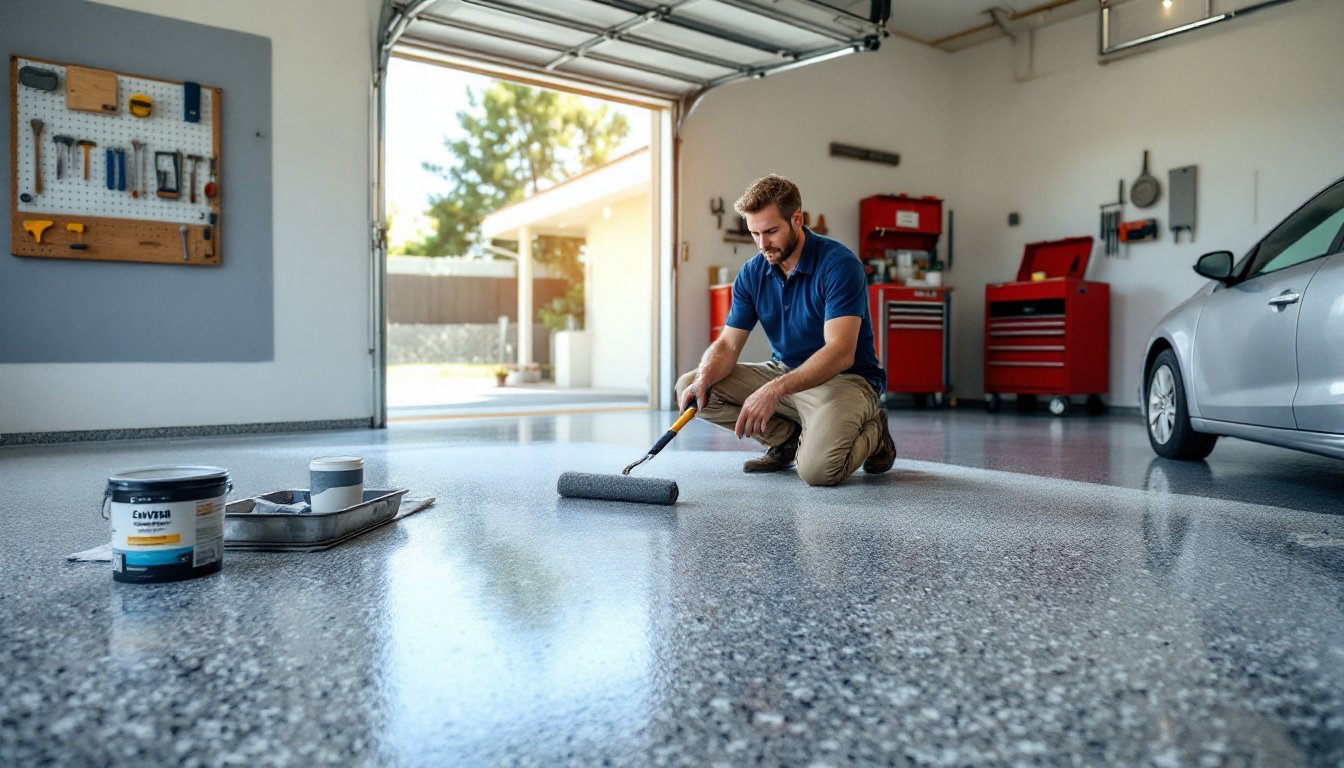
Epoxy floor coatings deliver a high-gloss, chemical-resistant finish that rivals professional installations, but DIY kits bring the cost down to $1–$3 per square foot for a typical two-car garage. These kits include epoxy resin, hardener, and decorative color flakes that hide imperfections and add slip resistance.
Surface prep determines success with epoxy. The concrete must be clean, dry, and slightly porous for proper adhesion. Start by degreasing with trisodium phosphate (TSP), then etch the surface with muriatic acid or use a concrete grinder to open the pores. Skip this step, and the epoxy will peel within months. Repair any cracks wider than 1/8 inch with concrete patching compound and allow 24 hours to cure.
Application requires working in sections. Mix only what can be applied in the pot life (usually 30–60 minutes), and use a 9-inch roller with a 1/2-inch nap for even coverage. Broadcast color flakes while the epoxy is still wet, then apply a clear topcoat 24 hours later for added durability. Most DIY epoxies cure enough for foot traffic in 24 hours but need 72 hours before vehicle use.
Temperature matters. Epoxy cures poorly below 50°F or above 90°F, and humidity should stay under 85%. Garage floors below grade or in high-moisture areas may need a moisture-vapor barrier first, test by taping a 2-foot square of plastic to the floor overnight. If condensation forms underneath, moisture mitigation is required before coating.
DIY epoxy holds up well to hot tires, oils, and light chemicals, but it’s not invincible. Sharp impacts can chip the surface, and UV exposure from open garage doors may cause yellowing over time. For high-traffic garages, consider a polyaspartic topcoat instead of standard clear epoxy for better abrasion resistance.
Interlocking Garage Floor Tiles for Easy DIY Installation
Interlocking tiles offer the fastest installation of any garage flooring, most two-car garages can be finished in a weekend with zero cure time. These rigid tiles, typically made from polypropylene or PVC, snap together via edge connectors and require no adhesive. Pricing ranges from $2–$6 per square foot depending on thickness and material quality.
Thickness determines durability. Lightweight tiles (1/4 inch) work for light storage areas but flex under vehicle weight. For garages housing cars or trucks, choose tiles at least 1/2 inch thick with a ribbed or diamond-plate surface for traction. Some tiles feature perforations that allow water and debris to drain underneath, useful in wet climates or for garages used to park snow-covered vehicles.
Installation starts in one corner, snapping tiles together row by row. No special tools are needed, though a rubber mallet helps seat stubborn connections. The tiles float over the concrete, so minor surface imperfections don’t matter, just sweep the floor clean before starting. Edge pieces and corner ramps are available to create a finished perimeter.
One major advantage: tiles are forgiving. If the homeowner decides to relocate or wants to change flooring later, the tiles pop apart and move with them. They also allow access to the concrete below for repairs, just lift the affected section.
Downsides include potential tile creep (the floor can shift slightly under vehicle turning forces) and noise. Hard plastic tiles produce a hollow sound when walked on, which some find annoying. Dirt and moisture can also collect in the joints or underneath unless the floor is sealed first. For anyone planning to use the garage as a heated workspace, expansion and contraction can create visible gaps over time.
Concrete Stain and Sealer: The Minimalist’s Budget Solution
For homeowners who want a finished look without covering the concrete’s natural character, acid or water-based stains paired with a penetrating sealer offer the most affordable option, often under $0.50–$1 per square foot in materials. Stains chemically bond to the concrete, creating variegated, translucent color that won’t peel or chip like paint.
Acid-based stains react with the lime content in concrete to produce earthy tones (browns, tans, greens, blues). The color is permanent but unpredictable, variations in the concrete’s composition create natural mottling. Water-based stains offer more consistent color and a wider palette but don’t penetrate as deeply. Both require a clean, etched surface for proper absorption.
Application is straightforward. After cleaning and etching, apply stain with a pump sprayer or sponge mop in overlapping passes. Acid stains need neutralizing with a baking soda solution after 4–6 hours, followed by thorough rinsing. Water-based stains dry faster and skip the neutralizing step. Once the stain cures (usually 24 hours), apply a penetrating silane/siloxane sealer to lock in color and repel moisture, oils, and stains.
Unlike epoxy or paint, stained concrete won’t hide imperfections, cracks, patches, and existing stains will remain visible. Some homeowners embrace this industrial aesthetic: others find it unfinished. The DIY repair tutorials community often uses concrete stain to blend patched areas rather than cover them entirely.
Maintenance is minimal. Re-seal every 2–3 years depending on traffic, and clean with a neutral pH cleaner. Avoid harsh degreasers that can strip the sealer. Stained concrete won’t stand up to heavy abrasion as well as epoxy, but for lightly used garages or those seeking a low-sheen, natural look, it’s hard to beat the cost-to-appearance ratio.
Garage Floor Mats and Rolls: Affordable and Portable Protection
Garage floor mats and rolls provide instant coverage with zero installation. Made from PVC, rubber, or foam, these products simply unroll or lay flat on the existing concrete. Pricing starts around $1–$2 per square foot for basic rolls and goes up for heavy-duty rubber or custom-fit mats.
Rolls are sold in widths from 7.5 to 10 feet and can be cut to length with a utility knife. Rubber and PVC versions resist oils and chemicals, while foam-backed options add cushioning for workshop use. Most rolls feature a textured top surface (coin, diamond tread, or ribbed) for traction and a smooth underside that grips the concrete via friction alone, no adhesive needed.
Containment mats are a subset designed to catch snowmelt, mud, and fluids. These have raised edges (typically 3/4 to 1 inch) that channel liquids away from the vehicle and toward a drain channel. They’re ideal for wet climates or anyone parking vehicles in winter conditions. After a storm, just squeegee the water out or use a wet/dry vacuum.
Installation involves unrolling the material and trimming to fit around obstacles. For multi-piece layouts, seaming tape can join sections, though most installers simply butt edges together. The floor underneath should be clean and dry, but surface prep is minimal compared to coatings.
Limitations include slippage (lighter rolls can shift under vehicle tires) and durability. Thin mats (1/8 inch or less) wear through quickly in high-traffic zones. Thicker rubber mats (3/8 inch or more) hold up better but cost more. Over time, sunlight exposure can cause fading or brittleness, especially with lower-grade PVC. For anyone renting or frequently moving, though, mats offer unbeatable flexibility, just roll them up and take them along.
Painted Concrete Floors: Simple Yet Effective Upgrade
Concrete floor paint is the most budget-friendly option, often $0.30–$0.75 per square foot, and requires only basic tools: a roller, brush, and paint tray. Specialized garage floor paint contains additives for chemical resistance and durability that standard latex lacks. Brands formulated for garage use typically cover 250–400 square feet per gallon.
Surface prep follows the same steps as epoxy: degrease, etch or grind, and repair cracks. Skipping this results in peeling paint within months, especially under tire traffic. For best results, apply a bonding primer first, this creates a mechanical bond between the concrete and topcoat. Many home renovation cost guides recommend budgeting extra for primer since it significantly extends paint life.
Application requires two coats minimum. Use a 3/4-inch nap roller for the first coat to work paint into the concrete’s pores, then switch to a 1/2-inch nap for the topcoat. Cut in edges and corners with a brush first, then roll in overlapping W-patterns to avoid lap marks. Allow 24 hours between coats and 72 hours before parking vehicles.
Durability is painted concrete’s weak spot. Even the best garage floor paint won’t match epoxy’s chemical resistance or abrasion tolerance. Hot tires can cause softening and tracking, especially in summer heat. Plan to repaint every 2–4 years depending on use, or add a clear polyurethane topcoat for extra protection.
For homeowners willing to trade longevity for upfront savings, painted floors still represent a massive improvement over bare concrete. Choose light colors (grays, tans) to brighten the space and hide dirt better than white or dark tones. Add anti-slip additive (fine sand or commercial grit) to the final coat for traction on sloped garage floors.
Conclusion
Garage flooring doesn’t have to blow the budget. Whether opting for the durability of epoxy, the speed of interlocking tiles, the subtlety of stain, the portability of mats, or the simplicity of paint, each option addresses the core problems of bare concrete, stains, dust, and deterioration. The right choice depends on budget, skill level, and how the garage gets used. For workshops and heavy use, invest in thicker materials or epoxy. For seasonal vehicle parking or rentals, mats and tiles make more sense. Success comes down to honest surface prep and matching the flooring type to actual needs, not aspirational Pinterest boards.


