Table of Contents
ToggleCats crave outdoor stimulation, the rustle of leaves, the flicker of birds, the warmth of sunlight, but letting them roam freely exposes them to traffic, predators, and disease. A cat patio, or catio, bridges that gap. It gives indoor cats supervised access to fresh air and nature without the risks. Whether you’ve got a sprawling backyard or a cramped apartment balcony, there’s a catio design that’ll work. This guide walks through practical, buildable options, from simple window boxes to freestanding enclosures, with the construction details you need to get started.
Key Takeaways
- A catio provides indoor cats with safe outdoor stimulation, preventing boredom and behavioral issues while protecting local wildlife from predation.
- Cat patio projects range from budget-friendly window box designs ($150–$300) to freestanding enclosures ($800–$2,000), fitting various spaces and budgets.
- Use 1/2-inch galvanized hardware cloth instead of chicken wire for secure screening that resists claws and prevents both escape and predator entry.
- Install multiple vertical levels, shade coverage, and enrichment elements like climbing shelves and water sources to maximize your cat patio design’s effectiveness.
- Check local building codes and obtain landlord or HOA approval before construction; most ground-level enclosures under 120 square feet avoid permit requirements.
- Seal all gaps and overlapping seams with exterior-grade materials, and reinforce the lower perimeter to prevent escape attempts from determined cats.
What Is a Catio and Why Your Cat Needs One
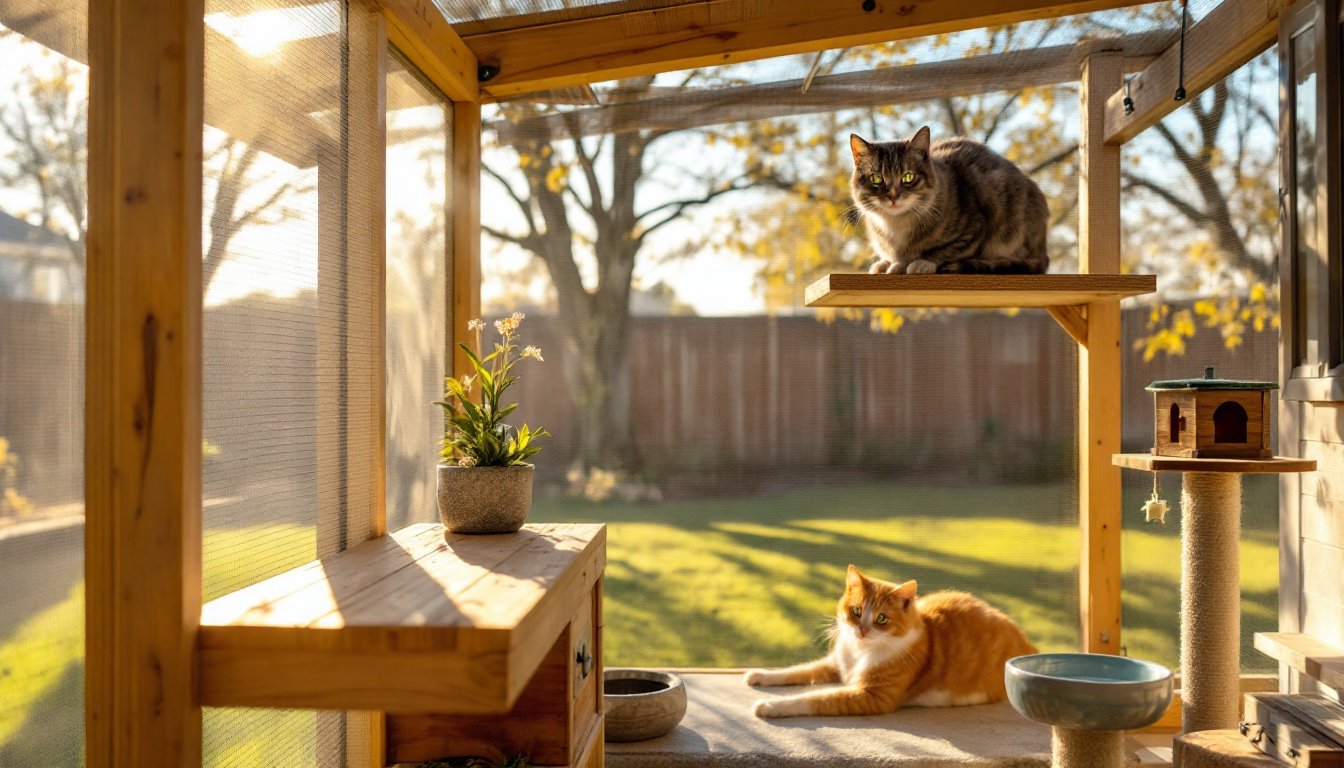
A catio is an enclosed outdoor structure designed to keep cats safe while they enjoy the outdoors. Think of it as a screened-in porch, but purpose-built for feline enrichment. It can attach to a window, sit on a balcony, or stand alone in the yard.
Indoor cats live longer, healthier lives, statistics consistently show they avoid the trauma, disease, and accidents that cut outdoor cats’ lifespans short. But confinement can lead to boredom, obesity, and behavioral issues. A catio provides the sensory stimulation cats need: sun, wind, smells, and visual interest from birds and insects.
From a practical standpoint, catios also protect local wildlife. Free-roaming cats kill billions of birds and small mammals annually in the U.S. alone. A well-designed enclosure lets your cat watch the show without being the predator.
Planning Your Cat Patio: Budget, Space, and Design Considerations
Before you cut a single board, assess your available space and budget. A window box catio can run as low as $150 to $300 in materials if you build it yourself. A large freestanding enclosure with quality lumber and hardware cloth might hit $800 to $2,000, depending on size and finishes.
Measure your space carefully. If you’re attaching to the house, locate studs and check for any utilities (electrical, plumbing, gas) that could interfere. For freestanding structures, check local setback requirements, many municipalities require enclosures to sit a certain distance from property lines.
Choose your access method. Most DIY catios use a cat door installed in a window, exterior wall, or even a sliding screen door. Pet doors come in various sizes: measure your largest cat and add 2 inches to their height and width for clearance. Some models include locking panels for weather or security.
Material selection matters. Use pressure-treated lumber rated for ground contact (at least 0.40 pcf retention) for any posts touching soil. For framing above grade, standard PT lumber or cedar works. Avoid chemically treated wood inside rest areas where cats will lounge. Hardware cloth (not chicken wire) is the go-to for secure screening, 1/2-inch galvanized mesh keeps out predators and prevents escape. Chicken wire is too flimsy and tears easily.
Permits and codes: In most jurisdictions, a ground-level, non-permanent catio under 120 square feet doesn’t require a permit. Structures attached to the house or exceeding certain dimensions often do. Call your local building department before you start. If you’re renting, get landlord approval in writing.
Screened Porch Conversion Catio
If you already have a screened porch, deck, or balcony, converting it into a catio is the easiest route. This approach skips foundation and framing, your structure’s already there.
Step 1: Inspect the screening. Standard fiberglass or aluminum screen won’t hold up to claws or determined climbers. Replace it with 1/2-inch hardware cloth or pet-resistant screen mesh. Hardware cloth is tougher but less transparent: pet screen retains better visibility.
Step 2: Reinforce the lower perimeter. Cats will test weak points. Secure the bottom edge of the mesh with a pressure-treated 1×4 or 1×6 baseboard screwed into the existing frame. This prevents cats from pushing under gaps.
Step 3: Seal gaps and openings. Check corners, door frames, and junctions where walls meet the floor. Use exterior-grade caulk or wood filler to close any escape routes. Cats can squeeze through openings as small as their skull, about 3 inches for most adult cats.
Step 4: Add feline furniture. Install wall-mounted shelves using 2×6 or 2×8 boards secured with heavy-duty brackets rated for at least 50 pounds each. Space them 12 to 18 inches apart vertically to create climbing routes. Add a few scratching posts (sisal-wrapped 4×4 posts work well) and a shaded resting spot.
Step 5: Install access. Cut a cat door into an exterior window or wall. If cutting through siding, use a jigsaw with a fine-tooth blade and seal the edges with exterior trim and caulk to prevent water intrusion.
This setup works great for apartment dwellers with balconies, though you’ll want to confirm building rules. Some HOAs or landlords restrict structural changes. Integrating elements from apartment patio designs can add aesthetic polish while keeping it functional.
Window Box Catio for Small Spaces
A window box catio is perfect for renters, tight budgets, or situations where a full enclosure isn’t feasible. It mounts directly to an exterior window and extends outward like a bay window.
Materials list:
- Four 2×2 or 2×3 boards (length depends on box depth: typically 24 to 36 inches)
- 1/2-inch hardware cloth, cut to fit all sides and top
- 1×2 or 1×3 trim boards for framing edges
- Exterior wood screws (2-1/2 inch and 1-5/8 inch)
- Heavy-duty L-brackets or angle irons to support the box weight
- Waterproof wood glue
- Exterior paint or stain
Construction steps:
- Frame the box. Build a rectangular frame using the 2x2s or 2x3s. The box should be slightly narrower than your window opening so it fits snugly. A depth of 24 to 30 inches gives cats room to turn around.
- Attach hardware cloth. Staple or screw the mesh to all five sides (bottom, two sides, front, top). Overlap seams by at least 2 inches and secure with screws and fender washers every 6 inches to prevent sagging.
- Add trim. Cover the raw edges of the hardware cloth with 1×2 or 1×3 trim. This hides sharp edges and gives a cleaner look.
- Mount securely. Locate the window frame studs or use wall anchors rated for outdoor use. Secure the box with L-brackets on the bottom and sides. The structure should support at least 50 pounds, some cats like to launch themselves at birds.
- Install the cat door. Remove the window screen and install a pet door insert, or cut a hole in a piece of 1/2-inch plywood sized to fit the window opening.
- Finish and weatherproof. Paint or stain all wood surfaces. Use exterior-grade products to resist moisture and UV damage.
Window box catios can also double as small patio decorating features when you choose finishes that complement your home’s exterior.
Freestanding Outdoor Cat Enclosure
A freestanding catio offers maximum flexibility and space. It can sit anywhere in the yard and be sized to fit your needs, from a compact 4×6-foot box to a sprawling 8×12-foot jungle gym.
Foundation options:
- Gravel base: Dig down 4 inches, lay landscape fabric, and fill with 3/4-inch crushed gravel. This allows drainage and prevents mud.
- Concrete pavers: Set 12×12-inch or 16×16-inch pavers on a leveled gravel base. Pavers are easier to remove if you relocate.
- Pressure-treated skids: Lay two or more 4×4 PT skids on level ground. This lifts the floor slightly and improves airflow.
Framing:
- Set corner posts. Use 4×4 pressure-treated posts cut to your desired height (typically 6 to 8 feet). Sink them 12 to 18 inches into the ground and backfill with concrete, or bolt them to a concrete footing. Check plumb with a level.
- Add top and bottom rails. Connect posts with 2×4 top and bottom rails, screwed or bolted at each joint. Use 3-inch exterior screws or 1/2-inch carriage bolts for strength.
- Install intermediate supports. Add vertical 2×2 or 2×3 studs every 24 inches on center to provide attachment points for hardware cloth and prevent sagging.
- Attach hardware cloth. Unroll 1/2-inch galvanized hardware cloth and secure it to the frame with fender washers and screws or heavy-duty staples every 6 inches. Overlap seams by 2 inches and wire them together with galvanized tie wire.
- Build a door. Frame a door using 2×3 lumber, cover with mesh, and hang it with exterior-grade hinges. Add a barrel bolt or gate latch that cats can’t manipulate.
- Add a roof. Options include more hardware cloth (provides ventilation but no rain protection), corrugated polycarbonate panels (sheds rain, allows light), or a simple sloped plywood roof covered with roofing felt and shingles. Pitch the roof at least 1/4 inch per foot for drainage.
Interior features:
- Climbing shelves: Mount 2×8 or 2×10 boards at varying heights.
- Logs or branches: Securely anchor natural wood for climbing and scratching.
- Hiding boxes: Small wooden cubbies or inverted plastic crates give shy cats a retreat.
- Litter box area: If the catio is large and used for extended periods, include a covered litter tray.
Freestanding enclosures work particularly well when integrated into broader outdoor patio layouts, especially if you’re already planning deck or patio upgrades.
Essential Features to Include in Your Cat Patio
No matter which catio style you choose, certain features improve safety, comfort, and enrichment.
Shade and shelter: Cats overheat quickly. Provide at least 30% shaded area using a solid roof section, outdoor fabric canopy, or strategically placed plants. If your catio is fully screened, add a weatherproof cat house or covered platform for rain protection. Ideas from covered patio designs can inspire practical shade solutions.
Water source: A heavy ceramic or stainless steel bowl prevents tipping. Refresh water daily, especially in summer. Some builders install a small pet water fountain with a low-voltage pump for continuous fresh water.
Vertical space: Cats feel safer and more confident when they can climb. Install multiple levels of perches, ramps, or shelves. Even a small catio benefits from three or more levels. Use 2-inch deck screws into studs or blocking, and test each shelf with your own weight before letting cats use it.
Enrichment elements: Attach bird feeders outside the catio (not inside, cleanup gets messy). Plant cat-safe greenery like cat grass, catnip, or spider plants in containers. Hang toys or install a sisal scratching post.
Predator protection: Hardware cloth is a must. In areas with raccoons, coyotes, or large birds of prey, add an apron footer, extend hardware cloth 12 inches outward at ground level and bury it or pin it down with landscape staples. This prevents digging under walls.
Safety locks: Use locking latches that require a thumb press or twist. Cats are smart: simple hook-and-eye closures won’t hold determined escape artists.
Ventilation and drainage: Ensure airflow on at least two sides. If you’re roofing with solid panels, leave 2 to 4 inches of open mesh near the roofline. Slope floors slightly (about 1/8 inch per foot) toward drainage points to prevent standing water.
Escape prevention: Double-check every seam, corner, and door. Walk the perimeter and press on the mesh, if it flexes more than 1 inch, add more fasteners. Install a double-door entry (an airlock-style vestibule) if you’ll be entering the catio yourself: this prevents cats from bolting when you open the door.
For design inspiration that balances function with aesthetics, browse resources on thespruce.com or hunker.com, both of which feature outdoor pet space ideas. If you’re working within a modest budget, strategies from budget-friendly patio projects apply equally to catios.
Conclusion
A well-built catio delivers years of enrichment and safety for indoor cats. Start with a clear plan, choose materials that’ll stand up to weather and claws, and don’t skip the details, secure mesh, proper fasteners, and thoughtful layout make the difference between a fun outdoor space and a maintenance headache. Whether you’re converting a balcony or building from scratch, your cat will thank you with healthier behavior and plenty of sun-soaked naps.


