Table of Contents
ToggleA concrete patio is a workhorse, it handles weather, foot traffic, and furniture without complaint. But let’s be honest: plain concrete looks unfinished. Adding a border transforms a slab into intentional outdoor living space. It defines edges, creates visual interest, and solves the problem of where concrete meets grass, gravel, or flowerbeds. Borders also hide the rougher edges of older pours and can tie the patio into the rest of your landscape. Whether you’re working with a fresh install or improving what’s already there, the right border makes a patio look planned, not poured.
Key Takeaways
- A concrete patio border protects vulnerable edges from chipping and cracking while creating a finished frame that transforms a plain slab into intentional outdoor living space.
- Popular concrete patio border ideas include natural stone ($8–$20/sq ft), brick pavers, stamped concrete ($8–$12/sq ft), and budget-friendly options like gravel ($1–$3/linear ft) or recycled materials.
- Proper base preparation with 4–6 inches of excavation and compacted gravel is non-negotiable for long-lasting borders that won’t settle or shift within a year.
- Landscape edging and restraint systems prevent borders from creeping outward due to freeze-thaw cycles and foot traffic, especially critical for paver installations.
- Plant-based borders using groundcovers, ornamental grasses, or raised planting beds soften the patio edge while adding greenery and dimension to your outdoor space.
- Polymeric sand for paver joints and penetrating sealers for stone and stamped concrete borders enhance durability and reduce maintenance over 2–3 year cycles.
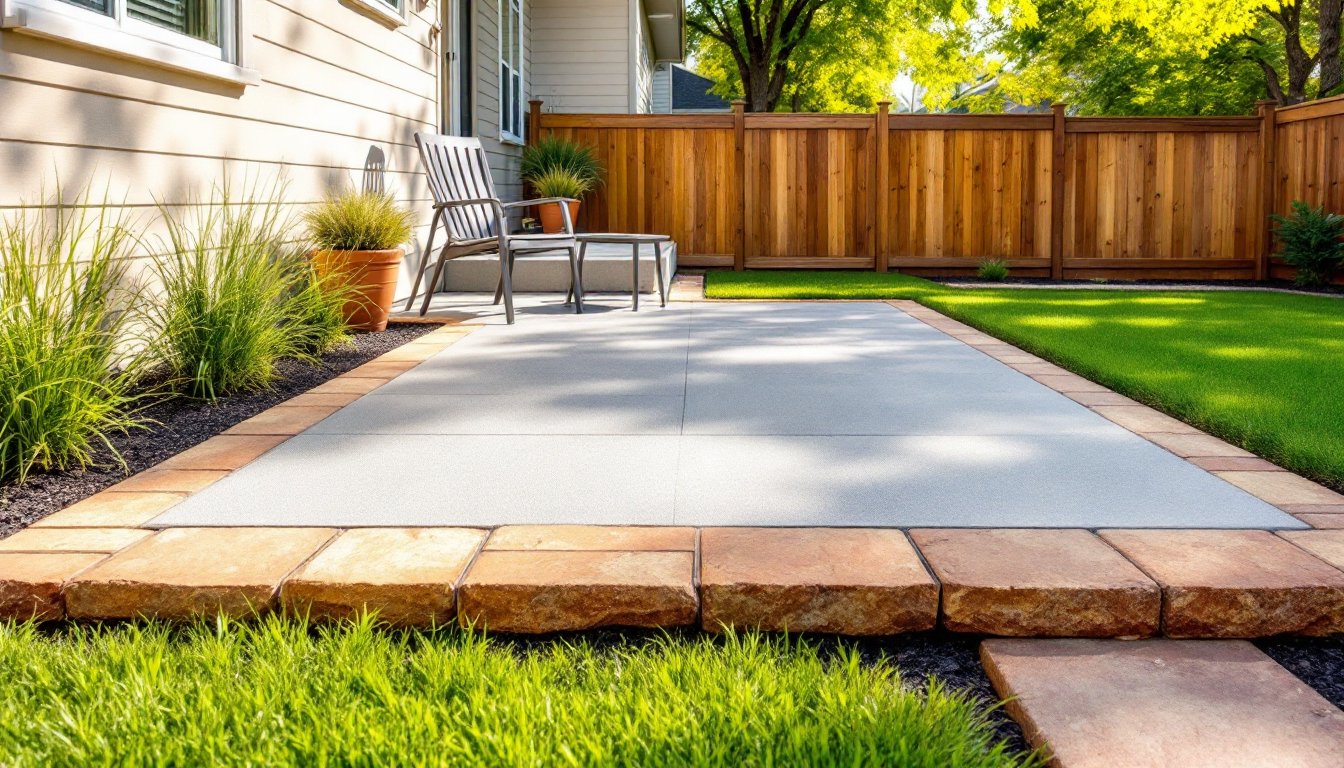
Why Adding a Border to Your Concrete Patio Makes a Difference
A border does three jobs: it protects edges, defines boundaries, and upgrades the look. Concrete edges chip and crack over time, especially where a mower or edger makes contact. A border made of harder materials like brick or stone shields the vulnerable perimeter.
Visually, a border creates a frame. It draws the eye inward and makes the patio feel like a deliberate feature rather than a leftover construction element. This is especially useful when the concrete doesn’t quite meet landscape beds cleanly or when you’re trying to integrate a patio into a yard that’s evolved over time.
From a practical standpoint, borders simplify maintenance. They create a clean transition between concrete and mulch, grass, or gravel, reducing the need for constant edging and preventing soil creep. They also provide a mow strip if you butt them up to turf, saving time with a trimmer. If you’re dealing with an older slab that has slight settling or cosmetic damage at the edges, a border can cover those flaws without requiring a full resurface.
Natural Stone and Paver Borders
Natural stone delivers a high-end look with material variation that complements smooth concrete. Flagstone, bluestone, and limestone are common choices. Cut stone gives you uniform dimensions for easier installation, while irregular flagstone requires more fitting but offers a rustic aesthetic. Expect stone to run $8–$20 per square foot depending on type and region, not including installation.
Installation involves excavating a trench around the patio perimeter, typically 4–6 inches deep, and laying a compacted gravel base (crushed limestone or Class II road base works well). Set stones in a 1-inch sand bed or mortar them directly to the concrete edge for a more permanent bond. If mortaring, use a type N or type S mortar mix and ensure the concrete edge is clean and slightly damp for good adhesion.
Brick pavers are a budget-friendly alternative that pairs well with traditional and cottage-style homes. Standard clay pavers measure 3⅝ × 7⅝ inches (actual size) and can be laid in a soldier course (standing upright) or sailor course (laid flat). Concrete pavers offer more color and texture options and tend to be more uniform in size. Both should be set on compacted base material: polymeric sand swept into joints helps lock them in place and resists weed growth.
For a cleaner modern look, large-format pavers (12 × 24 inches or larger) create bold lines with fewer joints. These work especially well when the patio itself is a lighter gray and you want a darker charcoal or tan border to frame it. Many DIYers appreciate budget-conscious approaches that blend hardscaping with affordable materials.
Creative DIY Border Options on a Budget
Gravel and river rock borders are simple and forgiving. Dig a shallow trench (3–4 inches), line it with landscape fabric to suppress weeds, and fill with ¾-inch crushed stone or river rock. Use metal or plastic edging to keep the gravel from migrating into the lawn. This approach costs $1–$3 per linear foot and takes a few hours for a standard 12 × 16-foot patio.
Stacked retaining wall blocks make an instant raised border. These interlocking concrete blocks don’t require mortar for the first course or two. They’re ideal if your patio sits slightly below grade or if you want to add a planting bed along the edge. Blocks run $2–$5 each, and a single-height border uses roughly one block per linear foot. Make sure the first course is level and set on compacted gravel: even a small slope will cause stacking issues.
Recycled materials offer character and cost savings. Reclaimed brick, broken concrete (urbanite), and salvaged stone can be mortared or dry-laid depending on the look you want. Urbanite is free if you’re breaking up an old slab elsewhere on your property: just wear safety goggles and gloves when splitting pieces with a sledgehammer or demo saw. The irregular shapes take longer to fit but create a one-of-a-kind edge.
Timber edging works for a cabin or rustic aesthetic, though wood in ground contact will eventually rot. Pressure-treated 4×4 or 6×6 landscape timbers last 10–15 years when spiked into place with rebar or landscape spikes. For longer life, use black locust or cedar. Avoid railroad ties treated with creosote near edible gardens or play areas due to chemical leaching. Those looking for ideas that extend beyond borders might find inspiration in small patio projects that maximize limited square footage.
Stamped and Stained Concrete Borders
Stamped concrete borders mimic stone, brick, or tile at a fraction of the cost. If the patio is new or you’re pouring an extension, you can stamp a 12–18 inch border in a contrasting pattern while the slab is still wet. Common stamp patterns include cobblestone, ashlar slate, and herringbone brick. Stamping requires timing, concrete must be firm enough to hold the pattern but wet enough to accept the stamp, so this is often best left to a contractor experienced with decorative concrete.
Cost for stamped borders runs $8–$12 per square foot installed, including integral color and a release agent (which prevents the stamp from sticking and adds subtle color variation). If you’re DIYing, rent stamps from a tool rental center and practice on a small test pour first. You’ll also need a tamper or hand roller to press the stamp, and knee pads because you’ll be working on wet concrete.
Acid staining an existing border creates rich, variegated tones, typically earth browns, terracottas, and blue-greens. The stain reacts with the minerals in the concrete, so results vary based on the mix and age of the slab. Clean the concrete thoroughly (pressure wash and allow to dry), apply the stain with a pump sprayer or brush, let it react for several hours, then neutralize and seal. Stain kits cost $50–$100 and cover roughly 200–400 square feet depending on porosity. Wear acid-resistant gloves and a respirator: these are chemical stains, not paint.
Water-based concrete stains offer more predictable color and are easier to work with, though they sit on the surface rather than reacting chemically. They’re a good choice for borders that will see less wear or for adding accent colors that aren’t achievable with acid stains. Both methods require a concrete sealer afterward to protect the finish and enhance color depth. Resources like Bob Vila provide detailed how-tos on staining techniques and troubleshooting common issues.
Landscape and Plant-Based Borders
Groundcover borders soften the transition between hardscape and lawn. Low-growing plants like creeping thyme, sedum, or mondo grass fill a 6–12 inch strip along the patio edge. This approach requires landscape edging (metal or poly) to prevent grass from invading and a drip line or soaker hose if rainfall is inconsistent. Groundcovers establish slowly, so plan on a full season before they fill in.
Ornamental grasses create height and movement. Dwarf fountain grass, blue fescue, or liriope work well in narrow beds (12–18 inches wide). Space plants according to their mature spread and mulch between them to suppress weeds and retain moisture. These borders look best when repeated along the entire perimeter rather than clustered in one spot.
Raised planting beds with a stone or timber retaining wall give you flexible growing space and add dimension. Build the bed 8–12 inches high using stacked stone, brick, or landscape blocks, then backfill with quality topsoil or a mix suitable for the plants you’re installing. This is an opportunity to incorporate perennials, ornamental shrubs, or even culinary herbs if the patio gets good sun. Adding layers of texture and greenery ties into broader outdoor decorating strategies that integrate plantings with hardscape.
Mulch borders are the simplest plant-based option. Edge the patio with metal or plastic landscape edging, then spread 2–3 inches of hardwood mulch, shredded bark, or decorative rock. This creates a clean line and reduces mud splash onto the concrete during rain. Mulch needs replenishing annually as it decomposes, but it’s inexpensive and fast to install. For design ideas that balance greenery and functionality, covered outdoor areas often integrate similar border treatments.
Installation Tips for Long-Lasting Patio Borders
Proper base preparation is non-negotiable. Excavate to the correct depth for your border material, typically 4–6 inches for pavers and stone to allow for base gravel and sand. Compact the subgrade with a hand tamper or plate compactor (rent one for about $60/day). Skipping compaction leads to settling and uneven borders within a year.
Edging and restraint keep borders from creeping or spreading. For loose materials like gravel or mulch, install metal or heavy-duty plastic landscape edging, staked every 3 feet. For pavers, use plastic paver edging or a concrete edge restraint secured with spikes. Without it, freeze-thaw cycles and traffic will gradually push pavers outward. Detailed guides on selecting pavers discuss base specs and edge systems that prevent common installation failures.
Slope and drainage matter, especially if the border is below the patio surface. Ensure water can escape, either by sloping the border away from the patio or installing a drainage channel if the patio is surrounded by higher grade. Standing water accelerates freeze damage and stains concrete.
Jointing material makes or breaks paver borders. Polymeric sand hardens when activated with water, locking pavers together and resisting weed growth and insect intrusion. Sweep it into joints when pavers are dry, then mist lightly according to product instructions. Standard masonry sand is cheaper but doesn’t harden, so expect more maintenance.
Seal or not? Sealing natural stone and pavers enhances color and provides stain resistance, but it also requires reapplication every 2–3 years. If the patio sees heavy use or is near a grill, a penetrating sealer is worth the effort. For borders in low-traffic areas, sealing is optional. Concrete stains and stamps, but, should always be sealed to protect the finish. General best practices and troubleshooting advice can be found at resources like The Spruce, which covers a range of hardscaping and landscape projects.
Conclusion
A well-chosen border turns a concrete slab into a finished outdoor room. Whether it’s natural stone for a polished look, DIY gravel for a weekend project, or stamped concrete for built-in detail, the border defines the space and protects the edges. Focus on solid base prep, proper drainage, and materials that suit both the patio’s style and the surrounding landscape. With the right approach, a border is a one-time project that pays off in curb appeal and durability for years.


